- Store
- Products
- Downloads
- Resources
-

User Guide
Brorsoft MXF Converter for Mac is an easy-to-use and intuitive Mac tool for camcorder users. It is professionalized in converting MXF recordings shot by Panasonic P2 camcorders, Canon XF series camcorders... to formats compatible with your video editing software like iMovie, Final Cut Pro, Final Cut Express, Avid, Adobe and more.
Part I: How to convert MXF/P2 MXF videos on Mac OS X
1. Import source MXF files
For loading source files to MXF Converter for Mac, you can click the "File" menu, and select "Add Video" to import source video. Or, click the "Add Video" button at the top left to select the file(s) you want. Well, dragging video to "Getting Started" area is also the alternative. And remember, you can import multiple files at once thanks to batch conversion. 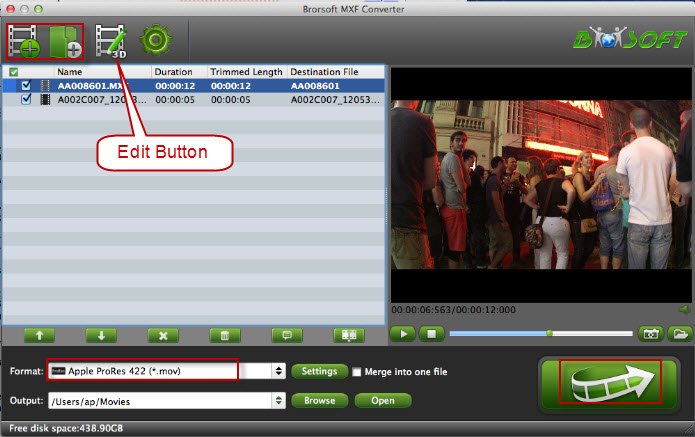
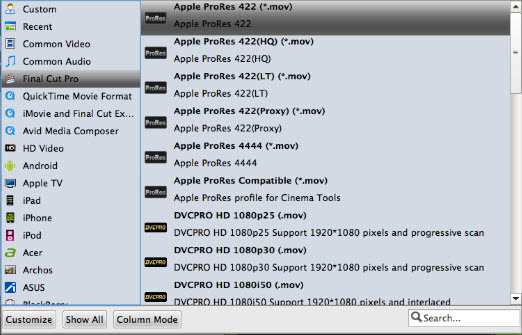
2. Choose supported video format
You can click on the pull down menu of "Format" to select your wanted format as output format from profile list. The profile list provides users with groups of flexible output solutions, including format presets for editing software like FCP, FCE, iMovie, Avid Media Composer, Adobe Premiere Pro and tablets, smartphones, game consoles, home media players and more. Select a desired format from the list, and then you can step into the conversion process.
3. Set Advanced audio/video Settings (Optional)
Click "Settings" icon to adjust video and audio parameters including video codec, video size, video bitrate, video frame rate, audio sample rate, audio channel, etc.
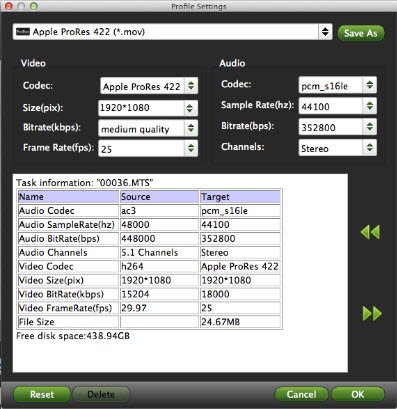
Tip: If the preset formats do not meet you needs, you can customize a format by yourself, and click "Save As" button to save your settings as a new format. When you'd like to use the new created format at next run, just click the format bar and find it in "Custom" group.
4. Convert MXF/P2 MXF Videos on Mac
After every thing necessary was selected, please click the "Convert" button to start MXF video conversion on Mac OS X. The Conversion window will pop up, which displays task list and progress information including Time elapsed, Time left, Generated size, and Estimated size. After conversion is done, simply click "Completed" to back to main interface, and click "Open" button to find generated videos.
Tip: If conversion takes long time, you can set auto shut down by checking the box of "Shut down computer after conversion".
Part II: Edit MXF footage
Brorsoft MXF Converter for Mac provides powerful editing functions so that you can personalize and retouch your videos before converting them. Click the "Edit" button and then select a specific function to open the video editing window. here are main seven functions available: Trim, Crop, Text Watermark, Image/Video Watermark, Effect, Audio Editor, and Subtitle.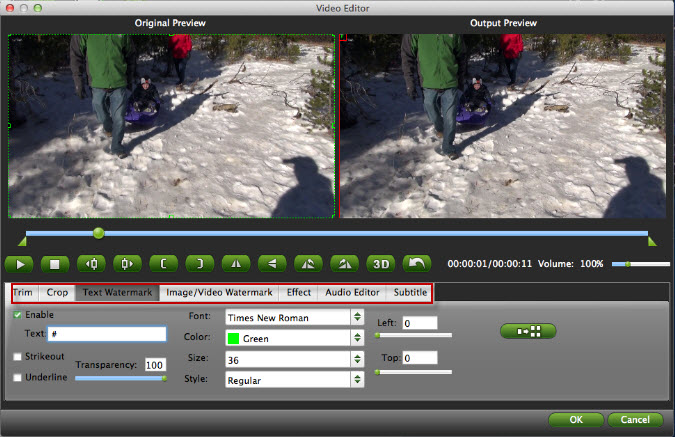
Trim: Select video durations by setting the start time and the end time.
Crop: Cut off black edges and unwanted areas.
Text Watermarking: Add text to the video as watermarks.
Image/Video Watermarking: Add image or video to the source video as a watermark.
Effect: Adjust brightness, contrast, saturation of the video, and add special effects including 3D effect to the video.
Audio Editor: Enable you to replace the original audio track with your specified sound track. Or choose to remove the audio. Plus, it‘s freely to set audio fade in or fade out.
Subtitle: Add plug-in SRT, ASS, SSA subtitle to videos.
We Promise

Useful Tips
Video Solutions
Social Connection
Home|
About Brorsoft |
Terms of Use |
Contact Us |
Sitemap |
Support


Copyright ? 2015 Brorsoft Studio. All Rights Reserved.