2 Easy Ways to Export Final Cut Pro Projects to FLV
When you finished a master in your Final Cut Pro, you may wanna export the Final Cut Pro project to FLV, as it's the best format for video-sharing sites like YouTube. While, how can we export Final Cut Pro to FLV and get good video quality? In this article, we will share two simple methods for you.
Method 1. Export Final Cut Pro using QuickTime Conversion
In Final Cut Pro, you could go to the menu: File > Export > Using QuickTime Conversion:
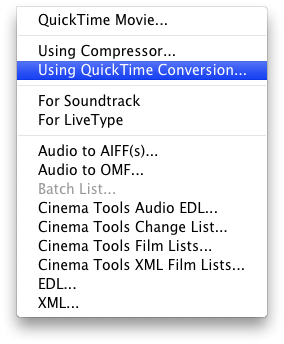
Once clicked, an additional panel is going to appear. At the bottom of said panel will be a toggle that says "Format". By clicking this button you will reveal the other options available to you. Note: You should install the Flash component. Then you can access to an option: "Flash Video (FLV)":
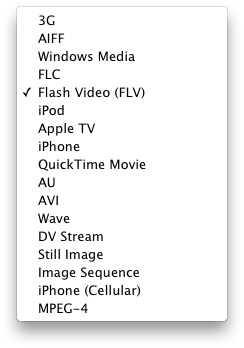
Once you've selected this you can then click the "Options" button and this will open a final panel where you can adjust all the parameters of the exported movie
Method 2. Export QuickTime Movie from FCP and convert it to FLV
The above method works only when you installed the Flash component correctly. If you haven't got a success on this way, you can try the alternative way we show below.
Step 1. Export MOV files from FCP
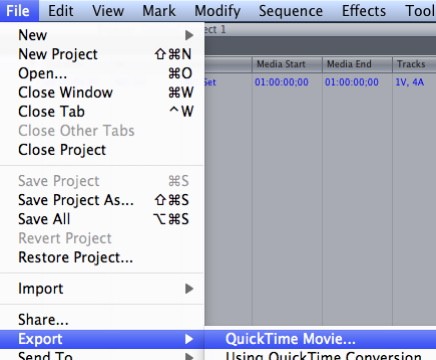
Final Cut Pro supports exporting your edited videos in MOV. To get MOV output, you can go to File and select Export option, and then choose QuickTime Movie. You will get your target output files in MOV formats.
Step 2. Download and install MOV to FLV converter
Here we recommend Brorsoft Video Converter for Mac, an easy-to-use yet professional app to achieve your goal.
Overall, the Mac QuickTime to FLV Converter is clean and safe to install and use. During the conversion process, with the Settings function, you can also tweak the video, audio parameters like video size, bitrate, freame rate, audio track, etc as you want. And only with barely several mouse clicks, you can get the whole job done. Besides FLV, it can also transcode Final Cut Pro export .mov to more video file formats like MP4, AVI, WMV, MPG on Mac OS X(El Capitan, Yosemite, Mavericks included) without any quality loss. Now just download the program and follow the below guide to encode MOV files to FLV for uploading to YouTube or other video-sharing sites.
 (Note: Click here for OS X 10.5)
Step 3. Load MOV files exported from Final Cut Pro
Launch the MOV to FLV converter. Go to your local folder where you have saved the MOV files. Directly drag and drop the MOV files exported from Final Cut Pro to this converter. Just add all the MOV files you want to the program for multiple conversion.
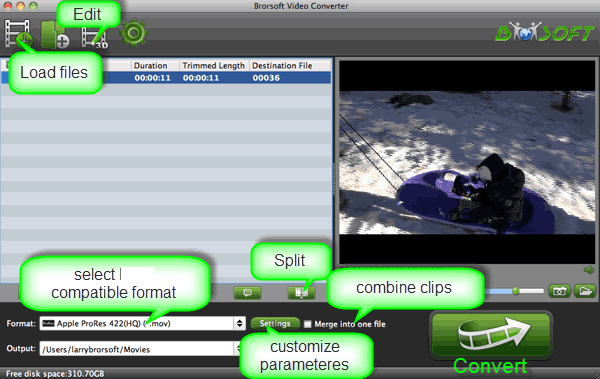
Step 4. Select FLV as target format and start conversion
Click Format bar and go to Flash Video > FLV-Flash Video Format(*.flv). In the end, click the big "Convert" button at the bottom right corner of the primary window to start converting FCP export QuickTime MOV to FLV.
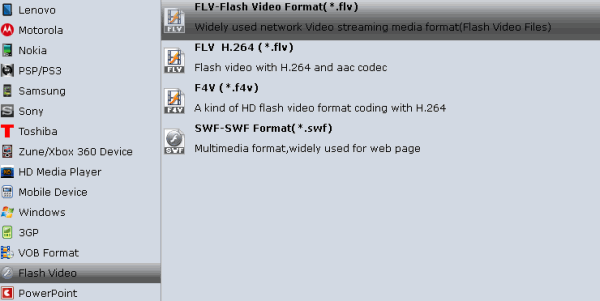
When the conversion is done, you can find the output files by clicking "Open" button on the main interface, then you can share the new FLV videos on YouTube or anywhere you want.
Useful Tips
Copyright © 2019 Brorsoft Studio. All Rights Reserved.


