- Store
- Products
- Downloads
- Resources
-

XAVC S No Importing in Lightroom - Solution
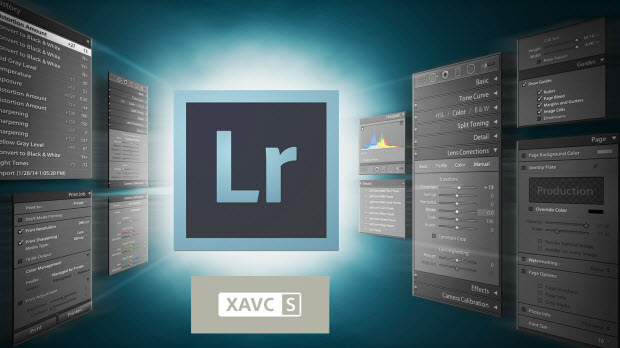
Generally, Lightroom enables users to organize, edit, and share photos from anywhere. In addition, Lightroom offers basic trimming and visual correction options for video files. Now in this article, we mainly talk about how to import and edit XAVC S in Lightroom as we found so many guys are stuck in XAVC S and Lightroom incompatibility issues:
"Downloaded Lightroom latest 6.1.1. Does anyone know if Lightroom will import Sony XAVC-S files? When I try, the program struggles to handle it."
"Recording some XAVC-S files, when I do an import (loading up automatically) from the SD card directly to Lightroom, (ignoring that it won't pick up Sony's Raw format), it never sees the video files."
....
Unfortunately, the current version of Lightroom is horribly optimized for playing video. It's a rarity for it to play XAVC-S with Lightroom. To import XAVC S to Lightroom for smooth editing, you'd better convert XAVC S to MOV. Brorsoft Video Converter for Mac is just what you need to achieve the goal.
This professional XAVC S converter is cable of transcoding 4K XAVC S to Lightroom best compatible editing format like .mov. The program also helps to encode XAVC S to Premiere Pro, Final Cut Pro, iMovie, Avid Media Composer, Davinci Resolve, Final Cut Express and other NLE editing programs highly compatible editing formats. For handling XAVC S files on Windows PC, you can use Video Converter to get rid of all of the incompatibility issue.
How to Transcode XAVC S 4K Video to Lightroom for Editing
Step 1: Input Sony XAVC S 4K video files.
Start the program on your computer, add Sony XAVC S 4K video to the program by clicking the "Add Video" or "Add folder" button.

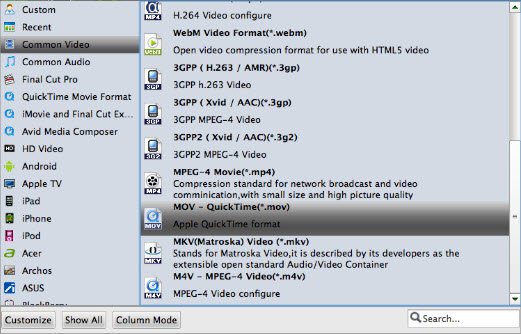
Step 2: Choose MOV format to output.
Ligthroom can support AVI, MOV, MP4, etc video files. Click Format bar and then you can also choose "Common Video -> MOV - QuickTime (*.mov)" as the output format.
Step 3: Customize output video and audio settings.
Open "Profile Settings" window to adjust output video and audio parameter settings according to your own preference. For smooth workflow of 4K XAVC S in Lightroom, you are recommended to downscale 4K XAVC S to 1080p from "Size(pix)" drop-down selection.
Step 4: Start the conversion process.
After all the setting is over, go back to the main interface and hit right-bottom "Convert" button to start XAVC S conversion process.
Now, it's much easy for you to add XAVC S files to Lightroom 4/5/6 for further editing.
Related Products
Video Converter for Mac


Useful Tips
- Import XAVC to After Effects
- Import XAVC to Pinnacle Studio
- Import XAVC to iMovie
- Import XAVC to Premiere Pro
- Import XAVC to Sony Vegas Pro
- Import XAVC to Final Cut Pro
- XAVC to Premiere Elements
- XAVC in Avid Media Composer
- XAVC in Windows Movie Maker
- XAVC S Format Introduction
- XAVC S to Final Cut Pro
- XAVC S to iMovie
- XAVC S to Avid
- XAVC S to Lightroom
- XAVC S to Adobe Premiere
- XAVC S to Sony Vegas Pro
- XAVC S to Sony Movie Studio
- XAVC S to PowerDirector
- XAVC S to Davinci Resolve
- XAVC S to Windows Movie Maker
- Upload XAVC S to YouTube
- Upload XAVC S to Facebook
- Convert XAVC S to ProRes
- XAVC S Converter for Mac
Social Connection
Copyright © 2019 Brorsoft Studio. All Rights Reserved.