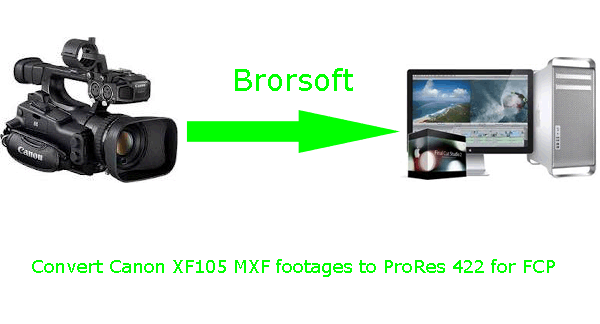
Import Canon XF105 1080i MXF Footages to FCP without XF Utilities
Canon XF105 HD Professional Camcorder adopts the latest HD technology and Canon's robust MPEG-2 4:2:2 codec, thus it records full HD video to affordable Compact Flash(CF) cards, making it as versatile as it is powerful. It is such an amazingly compact, fully featured pro video camera that takes nearly all the features and functionality of the 3-chip XF305. A newly developed Genuine Canon 10x HD video lens resolves images onto a native 1920 x 1080 CMOS sensor, which wraps in industry-standard MXF file using your choice of bit rate (up to 50Mbps), resolution, and frame rate.
Although Canon try to ensure the widest compatibility with existing industry infrastructure and non-linear editing (NLE), there still a long way to go. The XF Utilities can not help all the XF105 users to import Canon XF105 1080i MXF to FCP on Mac. How to solve the problem has become the hotly discussed problem on Apple forum, which seems to be no accurate and effective solution.

As we all know, Apple ProRes is the codec that FCP natively recognizes. So the problem can easily turn to be how to convert XF105 1080i recordings to ProRes for edting in FCP. After the MXF to ProRes conversion, you can directly import and edit the 1080i MXF files in FCP without any importing problems and need not to search for the latest XF Plug-ins or wait for the release of the suitable one.
As for the converter, the most highly recommend one is MXF to FCP Converter for Mac. Using it, you can not only transcode your XF105 1080i files to ProRes, but also deinterlace them to make the videos more smooth in FCP. Besides, the versatile converter is capable of merging several videos into one file, cropping video size, trimming video clips, and adding special effects and text/image/video watermarks to output videos to your original files. Thus, the MXF to FCP Converter becomes the highly received one by the MXF professional camcorder users.
 (Note: Click here for OS X 10.5)
Now, follow the step-by-step guide and you will get the way to edit your XF105 1080i files in FCP easily and effortlessly.
Step 1: Import Canon XF100 1080i MXF files to the best MXF to FCP Converter;
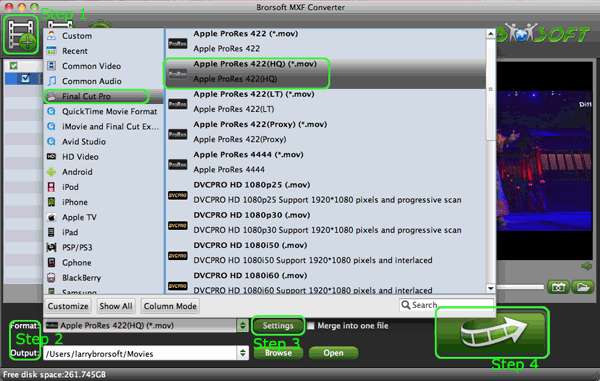
Launch MXF to FCP Converter on Mac. Click the button “File” to add MXF files to it. If it is necessary, you can double click the each file to have a preview.
Tips:
1. If you want to merge MXF files, just need to check the “Merge into one” box.
2. You shouldn’t move the single MXF video out of the whole MXF whole structure folder, or the MXF video would be wrong such as without audio.
Step 2: Select an output format for FCP and set the output folder.
Click on the “Format” and get the dropdown menu, then move you pointer to “Final Cut Pro”. Under the sub list are there a few formats which are all compatible with FCP. Here we recommend the Apple PreRes 422(HQ) if you give the priority to the quality of the converted videos. Then you can set the output folder by clicking “Browse” icon as you need.
Note: If you want the files to be in smaller size, you can follow Final Cut Pro>Apple ProRes 422(LT)(*mov)/Apple ProRes 422(*mov) option. If your files size is at SD levels, you are advised to choose Final Cut Pro>Apple ProRes 422(Proxy)(*mov), which is recommended for 480i/p and 576i/p shootings as well.
Step 3: Click “Settings” icon to adjust audio and video parameters.
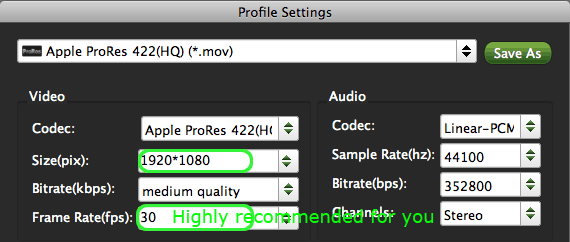
Click the “Settings” icon and you will go into a new interface named “Profile Settings”. You can adjust codec, bit rate, frame rate, sample rate and audio channel in the interface according to your needs and optimize the output file quality.
Note 1: You’d better set the video frame rate as 30fps, video size as 1920*1080 to keep the best quality for editing in Final Cut Pro, If the 60i/30fps is your original frame rate. But if you shoot with 50i/25fps, then 25fps as the frame rate will be your best choice when conversion. If you want to have a smaller file size but keep the good quality, you can change the video size to 1440*1080.
Note 2: Please click Edit and then you can deinterlace Canon XF105 1080i MXF files in the Video Editor.

Step 4: Start to convert and deinterlace Canon XF105 1080i MXF recordings.
Click the “Convert” button; it will convert XF105 1080i MXF files to ProRes for editing in FCP on Mac immediately. You can find the process in the “Conversion” interface.

When the MXF to ProRes conversion is 100% completed, you will be able to get the export files for FCP by clicking on “import” button effortlessly, no need to go to the Log and Transfer. Now you can edit XF105 1080i MXF footages in FCP.
Tips:
1. MXF to FCP Converter can also help you to transcode and deinterlace MXF files to any other playable and editable format like MOV, DVCPRO, Avid DNxHD, AIC, MOV(AVC), WMV, etc. for common tablets and NLE.


2. If you are interested in converting MXF files from other Canon/Panasonic/Sony profressional camcorders, please link to MXF Converter for Mac Guide to get the info you need.
Related guide:
Import Canon MXF to Cyberlink PowerDirector
Join/Display Canon XF300/XF305 MXF files on PS3
Edit Canon XF100 MXF files in Windows Movie Maker
Transcode Panasonic HPX250 MXF files to Adobe Premiere Pro
Convert XF100 1080p MXF to Apple ProRes for FCP X on Mac
Import Canon XF300 1080i MXF Files to FCP 7 without XF Plug-ins
Convert/Transcode MXF files to QuickTime MOV for playback on Mac
Deinterlace and Convert Canon C300 1080i MXF files to ProRes for FCP 7
Deinterlace and Convert Canon XF305/300/105 1080i MXF to ProRes 422 for FCP 7
Useful Tips
- Convert MXF to MOV
- Play MXF in VLC
- Play MXF in Media Player
- Upload MXF to Vimeo
- Upload MXF to YouTube
- Convert MXF with Handbrake
- Convert MXF to AVI/WMV/MPEG
- Convert MXF to ProRes High Sierra
- Transcode P2 MXF to ProRes
- Import MXF to After Effects
- Convert Canon MXF to Avid
- Play Edit Canon MXF on Mac
- Import MXF to iMovie
- Import MXF to VirtualDub
- Convert MXF to Premiere
- Convert MXF for Mac editing
- Convert MXF to Pinnacle Studio
- Convert MXF to PowerDirector
- Load Sony MXF to Final Cut Pro
- Edit MXF files with Davinci Resolve
- Sync MXF with Pluraleyes 3/3.5/4
- Edit MXF in Camtasia Studio 8/7
- Convert MXF to Windows Movie Maker
Adwards

Copyright © 2019 Brorsoft Studio. All Rights Reserved.


