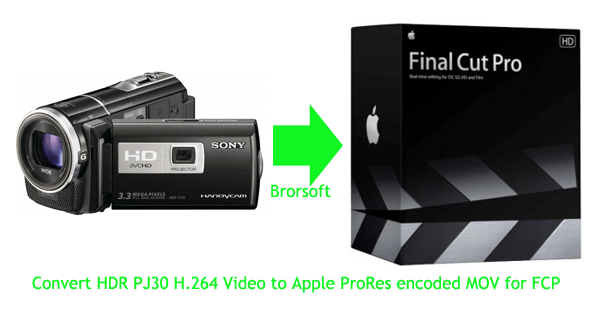
Convert HDR PJ30 H.264 Video to Apple ProRes encoded MOV for FCP
- Final Cut Pro must be the first choice for video editing for Mac users. Both professional videographers and amateurs find it a helpful and amazing editing system, although most users also find it very picky about what video formats you can import---almost QuickTime only. A new hand may feel depressed when failing to import .mts recordings to FCP, while experienced users will convert (transcode) the video to Apple ProRes Codec .MOV as output format more compatible with FCP.
- Similar to other high definition camcorders from Sony, the newly released Sony HDR-PJ30 (also named as HDR-PJ30E) HD camcorder also utilizes MPEG-4 AVC/H.264 codec for saving video contents. The MPEG-4 AVC/H.264 Codec, to some extent, is a delivery codec and not editable one. Wanna to edit the HDR-PJ30/30E 1080P AVCHD Videos in FCP? Convert them to Final Cut Pro friendly codec first. As the the best codec for FCP editing, Apple ProRes 422 and Apple Intermediate Codec should be the top tow codec packs. The following guide is written to show you how to convert HDR-PJ30 footages to Apple ProRes 422 Videos for FCP.

- Required Software: Brorsoft H.264 to Apple ProRes MOV Converter for Mac.
- Step BY STEP Tutorial
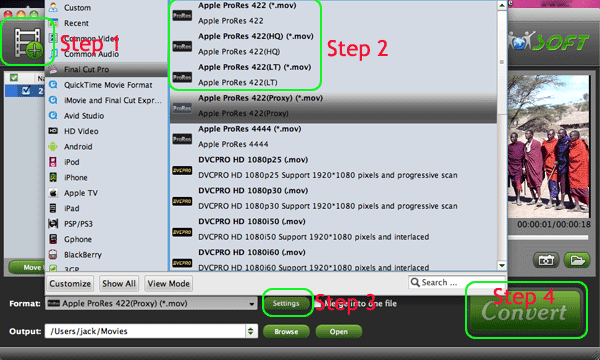
- Step 1. Load HDR-PJ30 1080P AVCHD Videos to Brorsoft HDR-PJ30 Converter for Mac.
Connect Sony HDR-PJ30 Camcorder to Apple iMac/MacBook Pro via USB 2.0 cable,transfer the 1080P AVCHD files that you want to deal with into Apple hard drive. After transferring to MAC, the footages become files with extensions of .mts. Run Brorsoft MTS/M2TS Converter for Mac as the best HDR-PJ30 Converter for Mac. Click the "Add" button to browse and import the .mts files to the app. - Step 2. Choose an appropriate Apple ProRes format for Final Cut Pro.
Click on “Format” bar and follow “Final Cut Pro” template to set a FCP friendly format. For Full HD 1080p AVCHD files, you are advised to Follow “Final Cut Pro” template and “Apple ProRes 422 (*.mov)” format. If you prefer smaller file size, choose “Apple ProRes 422 (LT) (*.mov)” instead. The “Apple ProRes 422 (Proxy) (*.mov)” format offers file size at SD levels and is recommended for 480i/p and 576i/p shootings. The “Apple ProRes 4444(*.mov)” creates videos in lossless quality at huge file size, and is not recommended for home video making.
- Step 3. Adjust audio and video settings appropriate for FCP.
Click the ‘Settings’ button and set proper video/ audio parameters. My advice is to set the video size, bitrate and fame rate to be exactly as the footages so that you will suffer least quality degradation. For example, when the video is shot at 1920*1080, 5mbps, 30fps, you could set Size-1920*1080, Bitrate-original, Frame rate-30. If you would like to use default settings, simply skip this step. - Step 4. Convert HDR PJ30 H.264 footages to Apple ProRes MOV.
Click “Convert” to start transcoding PJ30 H.264 to Apple ProRes MOV. The conversion process may take long time due to huge file size but trust me-- this Mac H.264 to Apple ProRes MOV Converter is faster than most other H.264 transcoding tools. And it will not bother to render the converted files in FCP. - After conversion just click the "Open" button to locate converted video files for FCE post-production seamlessly.
- Additional Tips and Tricks for the Mac H.264 AVCHD to Apple ProRes 422 Converter:
1. Thumbnail- click “Snapshoot” button when previewing the video. Click “Option” to set the image format of screenshots.
2. Deinterlace- click “Editor”, switch to “Effect” tab, find “Deinterlacing” box, and check it to eliminate interlacing lines.
3. Combine files together- check the files to be merged in file list and check “Merge into one” box beside “Settings” button.
4. Trim a section of the movie- click “Editor”, switch to “Trim” tab, and input time point in start and end box.
5. Auto shutdown- click “Option” menu and check “Shut down the computer after conversion” before conversion starts.
 Trust ourselves & embrace the world!